Using Ruby's Active Record Gem Outside The Rails Web Framework Part 2
A practical guide to integrating clean data persistence into a ruby standalone app in development and Heroku production


In part 1 of this article, we explained how to connect to the database, create a new database and drop an existing database with ActiveRecord outside of Rails. We also explained why and how to make our ActiveRecord commands into
raketasks. Great!
In this second part, we will discuss how to set up database migrations for the active_record database we created and how to configure our Rakefile to detect and adapt to both development and Heroku production environments. Let's go 💪🏾!
Database Migration Task - rake db:migrate
Migrations are ActiveRecord's optimal and elegant way to create tables, rows, columns in the database and assign rules to them without having to write raw SQL queries which may be ridden with loopholes.
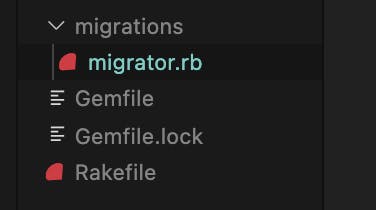
Since migrations are typically a couple of files that need to run whenever we run our migration task, we will need to find a way to make them run as a single unit when we run this task. Let's create that unit that runs our migration files. In the root folder of your project, create a new folder and name it migrations. Then inside the migrations folder, create a migration file called migrator.rb. Your project directory should now look like this:
In your migrator.rb file, declare a class called Migrator and let it have a migrate method:
# migrator.rb

class Migrator
  def migrate
  end
end
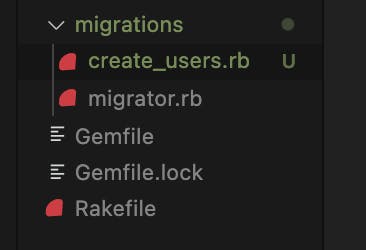
Our migrate method will house all the triggers/method call for our migration files. Let's first create a new migration to create a users table in our active_record db. Open the migrations folder and create a new file called create_users.rb` within it. Our project directory should now look like this:
In the create_users.rb file, we will declare a CreateUsers class and it will extend ActiveRecord's inbuilt Migration class. Also, we will define a change method to handle our migration code. See the code for this below:
# create_users.rb

class CreateUsers < ActiveRecord::Migration[6.1]
    def change
    end
end
NOTE: Since Rails 6, it is compulsory to state the version of the
Migrationclass you're extending from, which is why we have the [6.1] reference attached to theMigrationclass.
Next, we will write the code for our users table migration as we will normally do in Rails:
# create_users.rb

class CreateUsers < ActiveRecord::Migration[6.1]
  def change
    # new code begins
    create_table :users do |t|
      t.string :name
    end
     # new code ends
  end
end
In the new code above, we are simply saying when the change method for the create_users.rb is called, create a new table called users and let it have a name column of string data type. This should do, but we only want this to run if the table we are trying to create doesn't already exist. To control this, let's create a method in our CreateUsers class called table_exists? and tell it to check if our users table exists in the database already.
# create_users.rb

class CreateUsers < ActiveRecord::Migration[6.1]
  def change
    create_table :users do |t|
      t.string :name
    end
  end

  # new code begins
  def table_exists?
    ActiveRecord::Base.connection.table_exists? 'users'
  end
  # new code ends
end
Now, at the beginning of our change method, we'll perform the table_exists? check, hence our create_users.rb migration file should now look like this:
# create_users.rb

class CreateUsers < ActiveRecord::Migration[6.1]
  def change
    # new code begins
    return if table_exists?
    # new code ends

    create_table :users do |t|
      t.string :name
    end
  end

  def table_exists?
    ActiveRecord::Base.connection.table_exists? 'users'
  end
end
Great! This migration is now almost ready for use (and reuse). The next step is to call this migration in the migrate method of our Migrator class.
So, open your migrator.rb file and require the create_users.rb file at the top of it, so that our Migrator class can have access to the create_users migration like so:
# migrator.rb

# new code begins
require_relative './create_users'
# new code ends

class Migrator
  def migrate
  end
end
Now, we will call the change method of our CreateUsers class' in the migrate method like so:
# migrator.rb

require_relative './create_users'

class Migrator
  def migrate
  # new code begins
  CreateUsers.new.change
  # new code ends
  end
end
Next, we will declare our migrate task in the Rakefile, since it is the command to run all the migrations we have been setting up. After declaring the task, we will call our migrate method inside it like so:
# Rakefile

require 'active_record'
require 'pg'

namespace :db do
  db_connector = {
    host: 'localhost',
    adapter: 'postgresql'
  }

  ActiveRecord::Base.establish_connection(db_connector)

  desc "Create the database"
  task :create do
    new_db_name = 'active_record'
    db_create = ActiveRecord::Base.connection.create_database(new_db_name, {
      template: 'template0',
      encoding: 'unicode'
    })

    puts "Database #{new_db_name} created." if db_create
  end

  desc "Drop the database"
  task :drop do
    db_drop = ActiveRecord::Base.connection.drop_database('active_record')
    puts "Database deleted." if db_drop
  end

  # new code begins
    desc "Migrate the database"
    task :migrate do
      require_relative './migrations/migrator.rb'

      db_connector['database'] = 'active_record'
      ActiveRecord::Base.establish_connection(db_connector)

      db_migrate = Migrator.new.migrate
      puts "Database migrations ran successfully." if db_migrate
    end
  # new code end
end
In the migrate task, we:
- require our
migrator.dbfile so we can have access to theMigratorclass, then we call itsmigratemethod which will run all migrators inside it. - assign our database name to the
db_connector's config hash with this -db_config['database'] = 'active_record'. This is to indicate to ourestablish_connectionthat we specifically want to connect to and perform an operation with theactive_recorddatabase. Ourdb_connectorhash will now look like this:{ host: 'localhost', adapter: 'postgresql', database: 'active_record' } - open a connection pool to our
active_recorddatabase. - run our migrations by calling the
migratemethod and telling it to print'Database migrations ran successfully'if successful.
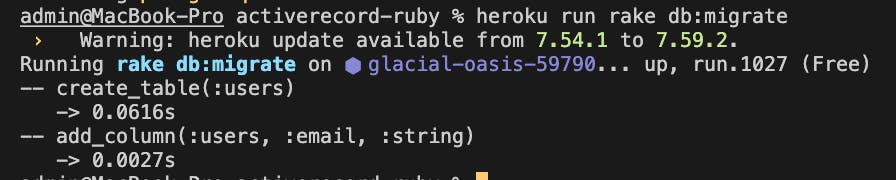
If we run rake db:migrate, our program should create a new users table with a name column in our active_record database. All things being equal, we should have this display in our terminal:

NOTE: Please, ensure you have the
active_recorddatabase created before running themigratetask.
The beauty of this setup we did for our migrate task is that we can now add other migrations to the active_record database and its tables without touching the existing migrations. For instance, let's say we now decide to add an email column to our users table, we can just simply create another migration for it and add it to our migrator method. Let's do that!
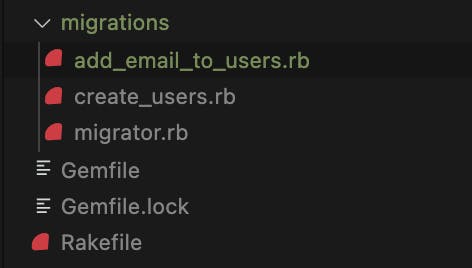
Add a new file called add_email_to_users.rb to your migrations folder. Your project directory should now look like this:
Next, in your add_email_to_users.rb file, declare a class called AddEmailToUsers and let it inherit ActiveRecord::Migration like so:
# add_email_to_users.rb

class AddEmailToUsers < ActiveRecord::Migration[6.1]
end
Then, we will declare our change method and put the ActiveRecord's standard add_column method for adding a new column to an existing table inside it:
# add_email_to_users.rb

class AddEmailToUsers < ActiveRecord::Migration[6.1]
    # new code begins
    def change
      add_column :users, :email, :string
    end
    # new code ends
end
The
add_columnmethod takes three arguments. First, the table we want to add a new column to (users), then the name of the column we want to add (string).
As we did in our CreateUsers migration class, we need a column to be added only when it doesn't already exist. So we will write a column_exists? method to do a check for this. See added code below:
# add_email_to_users.rb

class AddEmailToUsers < ActiveRecord::Migration[6.1]
    def change
      add_column :users, :email, :string
    end

    # new code begins
    def column_exists?(col_name)
      ActiveRecord::Base.connection.column_exists?('users', col_name)
    end
    # new code ends
end
In the new code above, we define a column_exists? method and we simply do a check for if the passed in column name already exists in our users table. To use this method, we will edit our change method like this:
# add_email_to_users.rb

class AddEmailToUsers < ActiveRecord::Migration[6.1]
    def change
      # new code begins
      add_column :users, :email, :string unless column_exists?('email')
      # new code ends
    end

    def column_exists?(col_name)
      ActiveRecord::Base.connection.column_exists?('users', col_name)
    end
end
Notice that we now update our change method to only add the email column to the users table if it doesn't already exist.
Finally, we will add this migration to the migrator method of our Migration class as we did our CreateUsers migration. We will require the add_email_to_users.rb migration file in our migrator.rb file:
# migrator.rb

# new code begins
require_relative './add_email_to_users'
# new code ends

class Migrator
  def migrate
    CreateUsers.new.change
  end
end
Then call it in the migrate method:
# migrator.rb

require_relative './add_email_to_users'

class Migrator
  def migrate
    CreateUsers.new.change
    # new code begins
    AddEmailToUsers.new.change
    # new code ends
  end
end
Now, when we run rake db:migrate, it should add an email column to our users table. Voila 😃!

Tweaking our Rakefile configuration to adapt to the Heroku production environment
So far, we have optimized our setup for local development and everything works fine, yay! But what happens when we deploy our project to a production environment like Heroku? Yep, you guessed right. CHAOS! That's because the production environment has its own rules/configuration that our Rakefile must adhere to. What we will do is tweak our Rakefile to be smart enough to differentiate between a local and production environment and adjust its configurations accordingly. Let's get to it.
This is not a how-to guide for Heroku deployment, hence we won't explain how to deploy to Heroku. However, if you need a guide for that, the official Heroku deployment guide will do just fine.
However, here's a rough guide to deploying this project to Heroku. Please make sure you have heroku-cli installed :
- Open an account with Heroku, if you haven't already.
- Run
heroku loginin your terminal. This should take you to a login page. - After logging in, run
heroku createto let Heroku create your app on their servers. You should get a response similar to this:
- Since our Heroku app will need an entry point over the web, we will make provision for this with a gem called sinatra and puma.
- Add
gem 'sinatra'andgem 'puma'to yourGemfile, then runbundle install. - Create a file called
app.rbin your root directory and add the code below inside it:
# app.rb

require 'sinatra'
get '/' do
    '<h1>Hello Active Record</h1>'
end
- Next, create a
Procfilein the root directory of your project and put the code below in it:
# Procfile
web: ruby app.rb -p $PORT -e $RACK_ENV
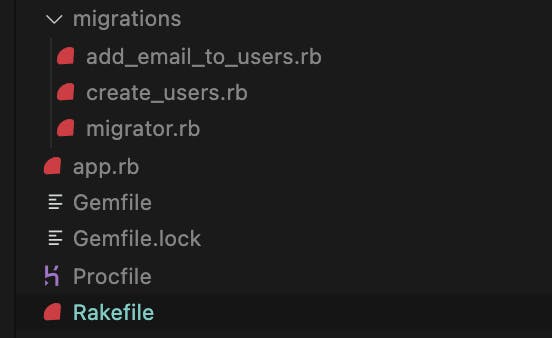
Your project directory should now look like this:
- Run
git push heroku mainto deploy to Heroku.NOTE: If, after pushing to Heroku, you encounter an error that says
Bundler Output: Your bundle only supports platforms ["x86_64-darwin-20"] but your local platform is x86_64-linux., simply runbundle lock --add-platform x86_64-linuxto fix it. Remember to commit the change. Now, push to Heroku again.
If we run heroku run rake db:migrate to migrate our database on Heroku, we will get the error below:

Notice that it says connection to server at "localhost" (127.0.0.1), port 5432 failed and this is because our rake migration task is currently trying to migrate to our development database which the production environment doesn't understand. In fact, if we try to create a database with rake db:migrate, Heroku will throw an error. This is because Heroku already provides a production setting and database that we must use. See the image below:
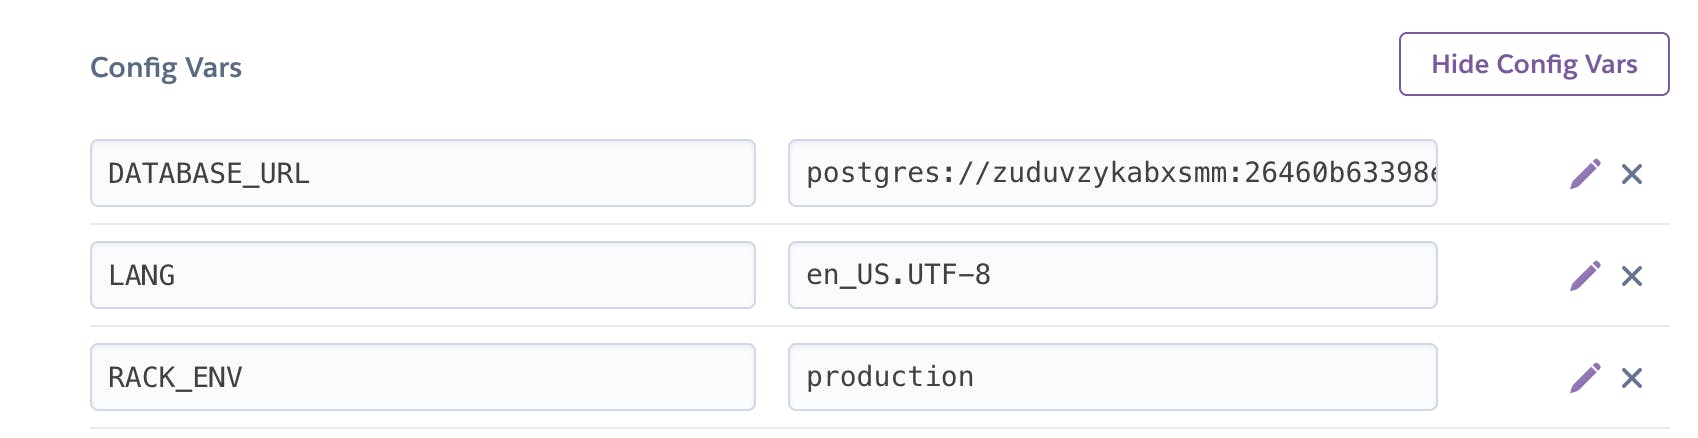
These are your app's config vars on Heroku. To access them, go to dashboard > {YOUR_PROJECT} > Settings. Then click on the
Reveal Config Varsbutton.
There are two things to pay attention to here, the DATABASE_URL variable for accessing our production database and the RACK_ENV variable which specifies that our app is in production. We will be using the RACK_ENV to modify our configuration.
Go to your Rakefile and modify your migrate task with the new code:
# Rakefile

require 'active_record'
require 'pg'

namespace :db do
  db_connector = {
    host: 'localhost',
    adapter: 'postgresql'
  }

  ActiveRecord::Base.establish_connection(db_connector)

  desc "Create the database"
  task :create do
    new_db_name = 'active_record'
    db_create = ActiveRecord::Base.connection.create_database(new_db_name, {
      template: 'template0',
      encoding: 'unicode'
    })

    puts "Database #{new_db_name} created." if db_create
  end

  desc "Drop the database"
  task :drop do
    db_drop = ActiveRecord::Base.connection.drop_database('active_record')
    puts "Database deleted." if db_drop
  end

  desc "Migrate the database"
    task :migrate do
      require_relative './migrations/migrator.rb'

      # new code begins
      if ENV['RACK_ENV']
        db_connector = nil
      else
        db_connector['database'] = 'active_record'
      end
      # new code end

      ActiveRecord::Base.establish_connection(db_connector)
      db_migrate = Migrator.new.migrate
      puts "Database migrations ran successfully." if db_migrate
    end
end
What we have implemented above is a simple yet effective solution. We check if set our connector configuration to nil if we are in production, this is because Heroku provides its own basic connections out of the box and configurations like host, adapter, database cannot be changed. And it will get the aforementioned configurations from its own DATABASE_URL environment variable. Passing nil as our connection configuration ensures there's no clash with Heroku's default configuration. You can read more about it
However our new updated will leave the connector configuration as it is and proceed to add active_record as the database to connect to for development.
Simply put, If we're in production, pass in an empty configuration and let Heroku resolve the best way to connect to its provisioned database, else, retain our initial connection configuration and set the database to
active_record.
Now in the local environment, run rake db:drop and rake db:create to drop and recreate your database, then run rake db:migrate. Everything should work just fine.
Next, commit your code and push it to Heroku, then run heroku run rake db:migrate and your migrations should work in production as well. Hence, one Rakefile configuration, two environments.
BONUS - rake db:reset
Sometimes in development, you can find yourself needing to drop, recreate and rerun your migrations, you can bundle this sequence into one rake task called reset and run it as one unit. Add a new task in your Rakefile like so:
desc "Reset the database"
task :reset => [:drop, :create, :migrate]
This will drop your database, create it again, then rerun your migrations.
NOTE: This will only work in local development as Heroku does not allow creating nor dropping a database. However, if you need to do something similar in production, you can use
heroku pg:reset. BE CAREFUL THO.
At this point, everything should work fine and even using Models with your ActiveRecord should run smoothly.
NOTE: You can find the codebase for the codes in this article here on Github